Sunday, March 17, 2013

Slowing Down...or Speeding Up?

I'm sure by now you've noticed that things around the Farmhouse blog have been a little slow here recently, and quite honestly it will probably remain that way for the foreseeable future.  

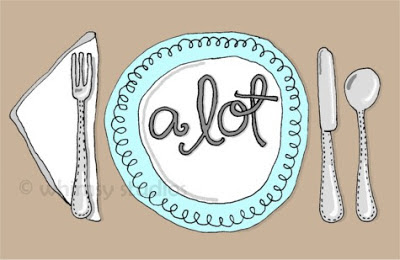
Right now I have
(via)

We only have 3 more months until Hubs finishes up school and, Lord willing, our big move back to Florida.  So...with such a short amount of time left and boxes and packing tape being on my near horizon, I'm not feeling inspired nor compelled to change anything up around here decor-wise.  For instance, my living room curtains have grown really old and are driving me bonkers, but....with only 3 months left I see no point in changing them now.  (Cue the 80's music...."I will sur-viiiiive!")

Not only that, a week from today my in-laws fly in to take over my house and my kids for a week.  Hubs has his Spring Break and he and I are going to make a frenzied jaunt down to the Sunshine State to do some scouting for a job and a house.  We REALLY REALLY want to buy and get settled down somewhere permanently.  We've moved an average of every 2 years in our 10 years of marriage and we are so sick of the "temporariness" of it all and more than ready for something permanent!  But...trying to find and buy property that meets our expectations (we're kinda picky) halfway across the country borders on miraculous, so most likely we will have to rent....again...for a few months.  Bleck.  

So, this week I have to get everything ready and in order for someone else to take over my household.  (Plus deal with the emotional stress of leaving my kiddos for 6 days.  My in-laws are beyond wonderful and I know for certain they will take excellent care of my sweeties, but I've never been away from them for more than a few hours so it will be a lil' emotional for me.  My eyes are tearing up just thinking about it.)

On top of that, I'm still homeschooling kiddo #1.  I've just been kind of doing this and that with her, not really following any set curriculum, just working our way along as I think she's able.  But...it dawned on me the other day that since I plan to homeschool her for at least one more year, it won't be long before it'll be time to order an actual curriculum for her and I needed to decide if I was going to start her on a Kindergarten one or put her right into 1st grade.  I did some research and decided that I'd be wasting my money if I ordered a Kindergarten curriculum as I think she's too advanced for most of it.  I think, for the most part, she's ready to move right into 1st grade work.  Now, if she's going into 1st grade that means I  need to make sure there are no gaps in her Kindergarten work.  So...with only 2.5 months left in the school year, I'm scrambling to make sure I've got everything covered and that she'll be ready to start a more formal curriculum at a higher grade level.

PLUS...(as if the above 3 paragraphs weren't enough already) I still have oodles of vintage inventory from last year's yard sale adventures that have yet to be listed in my Etsy shop.  Seeing as we won't have room to move it with us (and Hubs has warned me time and time again that if it's not gone by moving time, he's putting it out by the road for the picker's to dig through) I have GOT to get it all photographed, cataloged, and listed and pray that a good bit of it sells before the picker's get their hands on it...'cause Boss Man ain't jokin' y'all!

(via)

So, I'm feeling like this is a bit much for one woman to handle in only 3 months and something had to give and unfortunately the only thing that isn't a "must" at this point is this blog.  I can't afford to spend time and energy stressing over not having a new project to share or worried that everyone will think I've abandoned them.  So, here I am saying that I am NOT abandoning you, I don't plan to give up blogging, but things will be a little slow around here for awhile.  Just bear with me during all of this craziness, and don't abandon me.  I'm sure I'll be posting some tidbits about the progress of everything, and maybe even a small little project here and there, and someday a few months down the road I'll be able to start sharing the transformation of a new "Farmhouse."

If you're not already a fan, be sure to "like" my Facebook page as it'll be easier for me to post updates there than it will be to blog about it.  Though I won't leave my blog readers out in the cold either, I promise.

If you're a praying person, I would covet your prayers for our family over the next few months and all of the changes we have in store for us.  Especially for the week after next as we have 30 hours round trip of driving ahead, and lots of searching to do.

But...

(via)


Wednesday, March 6, 2013

Crusted Chicken Romano

Today I'm sharing with you what is hands down my family's favorite meal.

 Crusted Chicken Romano


I had something similar at The Cheesecake Factory a few years ago and really enjoyed it.  In trying to replicate it I came up with this recipe and it has become our favorite meal.  I make it about once a month and it's requested for any special occasions like birthdays, Valentine's Day, etc.


Here's what you'll need:

- Boneless Skinless Chicken Breast (learn how to get it for .99/lb HERE)
- milk
- 2 eggs
- grated Parmesan & Romano cheese (about 3/4 cup)
- Italian style bread crumbs (about 1 cup)
- garlic salt (2 tsp, separated)
- olive oil and salt & pepper (I realized too late that I left these out of the picture)
- pasta of your choice (we prefer linguine, fettucini, or spaghetti)


You're going to start by slicing the breasts in half lengthwise so that you end up with two thin breast pieces.


Then you're going to pound them out even thinner.  I like to place them two at a time into a gallon sized Ziplock.  It keeps the mess contained and they don't slide around and get away from you like they do if you place them between two pieces of plastic wrap.  For some reason I don't have a meat tenderizing hammer, so I just pound them with a rolling pin to flatten them out.


You want them pretty thin, but not so thin that they're tearing apart. 
 If I know I'm going to be strapped for time I try to have this done the day before to save myself the extra step.


Now let me just say here that the frying process for these is very quick, so if you're making pasta as a side dish you're going to want to go ahead and start heating the water for that before you start on the breading process, and let that boil while you work on the rest of it.  I've made the mistake of waiting too long into it to start the pasta, and then I end up waiting and waiting for it while the chicken is getting cold.


Once you get them all pounded out you'll want to season them well with salt and pepper so that the meat has flavor underneath the crust.


Next you're going to mix up the 1 cup of the bread crumbs, 3/4 cup of the grated cheeses, and the teaspoon of garlic salt.  Make sure it's blended really well. 


Mix up the eggs and some milk for the breading process.


Then you'll dip the chicken in the breading, patting/pressing it on so that it adheres well.


Dip the chicken into the egg mixture making sure it's well coated, and allow the excess to drip off.  Just like with the Southern Fried Chicken recipe, excess moist coating will cause the 2nd layer of breading to slip off.


After the egg mixture, you'll place your chicken back into the bread crumbs for a 2nd coating, pressing and patting it on.  Repeat this process for all your chicken pieces.


Once you're about half way through the breading process, you can start to heat your skillet.  You'll want a medium heat.  I use setting number 4 on my stove with my cast iron skillet.  You need it to be hot enough to sear the coating, but not so hot that it turns them black before they're cooked.  

I like to let my skillet get nice and hot and then add the olive oil right before I start frying.  I add just enough to cover the bottom of the skillet.  Olive oil heats very quickly so you can add the chicken almost immediately after pouring it into the skillet.
(By this time your pasta should be boiling away.)


Carefully lay your chicken into the sizzling oil.


Now, these are very thin and they will only take 1.5 - 2 minutes on each side of frying time.  
Turn them when they're a nice crispy golden brown.  And same as the fried chicken, in between batches you can keep them hot and crispy by loosely covering with foil and placing in a warm oven (about 200 degrees)...unless you're baking garlic bread to go with it.  Then you'll just want to cover them with foil and leave on your counter.

Also in between batches you may want to use several paper towels and carefully wipe out the old olive oil and add a fresh layer of oil to fry in.


4 chicken breasts cut in half will give you a nice big platter of 8 servings.
(That's my homemade bread rising in the background there...but that will be for another post.)

Your pasta should finish up about the same time as your chicken.  After you drain it, add some olive oil to it and the other teaspoon of garlic salt (or to taste if that's too strong for you).  I also like to add a bit of dried basil to it for an additional flavor, and extra color and interest.  


Pair this dish with a salad, Quick and Easy Garlic Bread or yummy garlic knots, and you've got a full course meal your family will love.


If you try this recipe out I sure hope you'll come back and let me know how it turned out and what you thought of it.  I know my family cleans their plates and asks for seconds every time I make it. 
 It never gets old.  : )


Friday, March 1, 2013

Simple and Budget Friendly Pool Party

 I don't know about you all but I am d.y.i.n.g. for some sunshine and warm weather!  I've just had it with all this snow and freezing rain and dreariness.  It's horrible.  Who in the world chooses to live here permanently is what I wanna know?!?  

Anyways, in trying to pull myself out of my winter-blues-induced-almost-depression, I was looking through some old photos from our life in Florida and I realized I've never shared my daughter's 3rd birthday party here on the blog.


This was pre-blogging days so the pictures aren't quite what they would be now, but I still wanted to share it.  
It was simple and very budget friendly, but the kiddos still had a blast.

So let Lucy do some 'splainin' here first.  I was 8 months pregnant (very very pregnant), I was huge, my feet were swollen, and I tired easily.  I knew I would need something really simple, easy, and cheap (hello...baby on the way!).  My original plan was just to pay McDonald's $75 to have them host the party and let the kids play their little hearts out on the Play Land.  But as it turned out none of the McDonald's in that area participated in the birthday parties.  So...I had to come up with plan B.  This was August...in South Florida.  August is the hottest month of the year down there and the temperatures can be sweltering.  The only option for an outside party was for it to be something involving water.


So I decided on a very simple pool party with pizza and cupcakes.  We kept it really small with just close family and a few little cousins.  My husband's grandma's house had a pool and she kindly consented to let us do the party there.

Most of the decorations came from Walmart or the dollar store.  
Colorful pennant buntings were hung, beach balls were added for color and to play with while swimming, and....


See these balloon clusters the arrows are pointing at?  They were actually punching balloons.  At the end of the party the kids got to take them home as a favor.  Double duty = wallet friendly.


This table was setup with plates, napkins, and favors and more bunting was added around the front.  The huge sunglasses served as decorations at first, and then the kiddos got to take them home as another favor.


The centerpiece was a dollar store bucket filled with sand with colorful lollipops stuck down inside.  And yep, you guessed it, they were favors for the kiddos.


I found cute paper goods at an online store that went along with our pool theme.


Another small table was set up for gifts.  
(Can you see the wall thermometer in the background?  It's pointing at 90....degrees....in the shade.)


(We're a very conservative Christian family and we don't do mixed swimming so after the moms and kids had their turn swimming, the men joined us for the pizza, cupcakes, and present opening. Then they had their turn swimming after us ladies took the kiddos home for their much needed naps.)

 After the pizza was devoured I cleared off this table and brought out the desserts.


Very simple cupcakes that I made myself.  The sun toppers kept the theme going, and were actually little rings....that served as favors.  :D


I also made these  cute little flip flop "sandals" laid on a folded up washcloth that was supposed to resemble a beach towel.  They were just Nutter Butter cookies, frosting, and those sour gummy worms cut into pieces and split open.


And here's Birthday Girl immensely enjoying the pool!

{Sigh}...I've had fun reminiscing about the sunshine....and heat....and being tan, but now it makes me miss it even more.  I'm getting so excited for our upcoming move back to the Sunshine State! 
 (The smart ones don't stick around if they don't have to, lol!)

I hope you enjoyed another simple and budget friendly party.  You don't have to go overboard on decorations, and food, and every little detail for it to be special.  Fun and good memories can be made even on the simplest of budgets.  


(Affiliate links)
                                      
Related Posts Plugin for WordPress, Blogger...